For anyone who has progressed past the point of basic maintenance and wants to up their game to include joining metal, it’s a skill that can be learnt with a little practice but knowing which technique should be used to join different types of metal is the first step. In all cases, joining metals, from soldering electrics to welding steel sheet is one of most satisfying things to do in a workshop and like panel beating, once mastered, means doing away with the frustration and cost of having to pay someone to do the job.
The first step is understanding the different groups of metals and the various techniques used to join them. One obvious misuse of terminology here is when people say “weld” when they mean “solder” or “braze.”

Welding means making a permanent join by melting metal while adding to the joint with a filler rod or wire of the same material. Soldering and brazing are more like glueing two things together, but at a high temperature with a melted metal alloy. In most cases soldering and brazing can be separated by applying enough heat again but a weld can only be separated by cutting or grinding.
The two main groups of metals are ferrous and non-ferrous, ferrous being anything with iron in it, like mild steel. Non-ferrous metals typically found in classic cars include copper, brass and aluminium alloys.

We’ll start with soldering and the best uses for it in terms of classic car restoration and move on to welding in a following instalment. The two main types of solder are soft solder and silver solder. The first is a relatively low temperature process while the second is high temperature, requires heat from a blow torch and produces a much stronger joint.
While it is possible to soft solder steel, it’s most useful in automotive repairs for soldering brass and copper, typically in electrics. Silver solder is hard and useful for making stronger joints between objects which may be copper-based materials (like brass) or materials from different groups like brass and steel.
First soft soldering. In any soldered joint the key word is “flow” not “stick”. The solder must flow right into the joint by capillary action and not be stuck onto the outside. Achieving that requires two things, the first is absolutely clean surfaces with not a spot of corrosion and the second is the correct temperature.
The are many kinds of solder and fluxes available for soft soldering. I like to use a general purpose electrical solder for routine jobs. Most have a flux core (which improves the quality of the job by deoxidising the surfaces being joined), but I still use a flux paste as well because I find it produces a better job. Traditional soft solder is made of lead and tin but for obvious reasons many these days are lead free. In my experience, lead-free solder doesn’t flow and bond as nicely as the traditional variety but using additional flux fixes that.
It’s useful to have a couple of sizes of soldering iron – a more powerful heavy-duty iron for larger jobs where more heat will be conducted away, and a smaller one for more precise jobs. Traditionally, soldering irons had large, heavy copper tips heated externally by a naked flame to the point were green flickers just begin to appear in the flame signalling the iron has reached the right temperature. These are still great for soldering larger jobs like butt-joints on brass or copper sheet for those who prefer traditional methods.
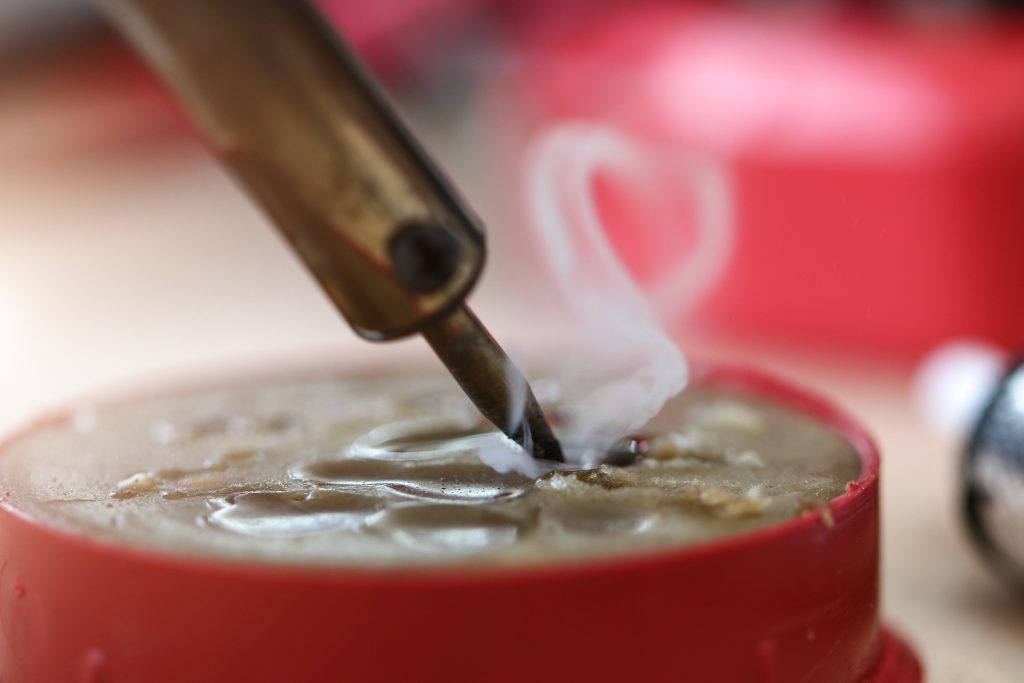
The default these days is electric though. I prefer ‘pencil’-style irons with copper tips (rather than the pistol type) and lightly file the tip to remove oxidation before starting. Once it’s hot, dab it in flux and “tin” the tip with solder. When that’s done the surface of the tip should look as if it’s been silver-plated.
Soldering the joint depends to some extent on its size. If soldering a point, like two pieces of wire, briefly touching the joint with a tinned iron will be enough for solder to flow into it and make the join without allowing heat to conduct up the wire and cause damage, or for solder to run up under the insulation. Soldering wiring joints or connectors is contentious and many advocate crimping only, but we’re not entering that debate here, merely explaining how to do it. Solder should be used sparingly but must flow right into the joint and at that point, the work piece itself will be close to the temperature of the iron immediately around the joint.
There shouldn’t be any need to use a blow torch for soft soldering if the right size iron is used, but there will be with high temperature silver solder. Using it requires the same scrupulous attention to detail. With a perfectly clean and shiny joint, with silver solder flux dabbed onto the joint, heat using the torch then as the joint begins to redden, touch the joint with the end of the silver solder while briefly waving the flame away. Once the work piece is hot enough, the solder will melt and flow into the joint.
Bear in mind the effect of the substantial amount of heat that will be conducted away from the site and the effect it may have on surrounding parts, and be extremely careful not to set fire to anything when using the torch! Also remember that any heat treatment of steel will be undone at these temperatures.
Producing a decent soldered joint isn’t a walk in the park, but practice makes perfect and perfecting the technique can be good fun.
Read more
Socket Set: Hammers for (almost) every workshop job
Reviewed & Rated: e-scooters and e-bikes
Knowing when to back away from a repair


